How to Use the ATSafePro Torque Wrench for Precision Fastening
In the world of automotive and mechanical work, precision is everything, and the ATSafePro torque wrench stands out as an indispensable tool for achieving exact torque specifications. This versatile device ensures that bolts and fasteners are tightened to the correct levels, preventing over-tightening that can damage components or under-tightening that compromises safety. Whether you're working on cars, motorcycles, or general machinery, mastering the ATSafePro torque wrench can elevate your repair and assembly skills to professional standards. In this guide, we'll walk you through the steps to select, set up, and use this high-performance tool effectively.
Understanding the Basics of the ATSafePro Torque Wrench
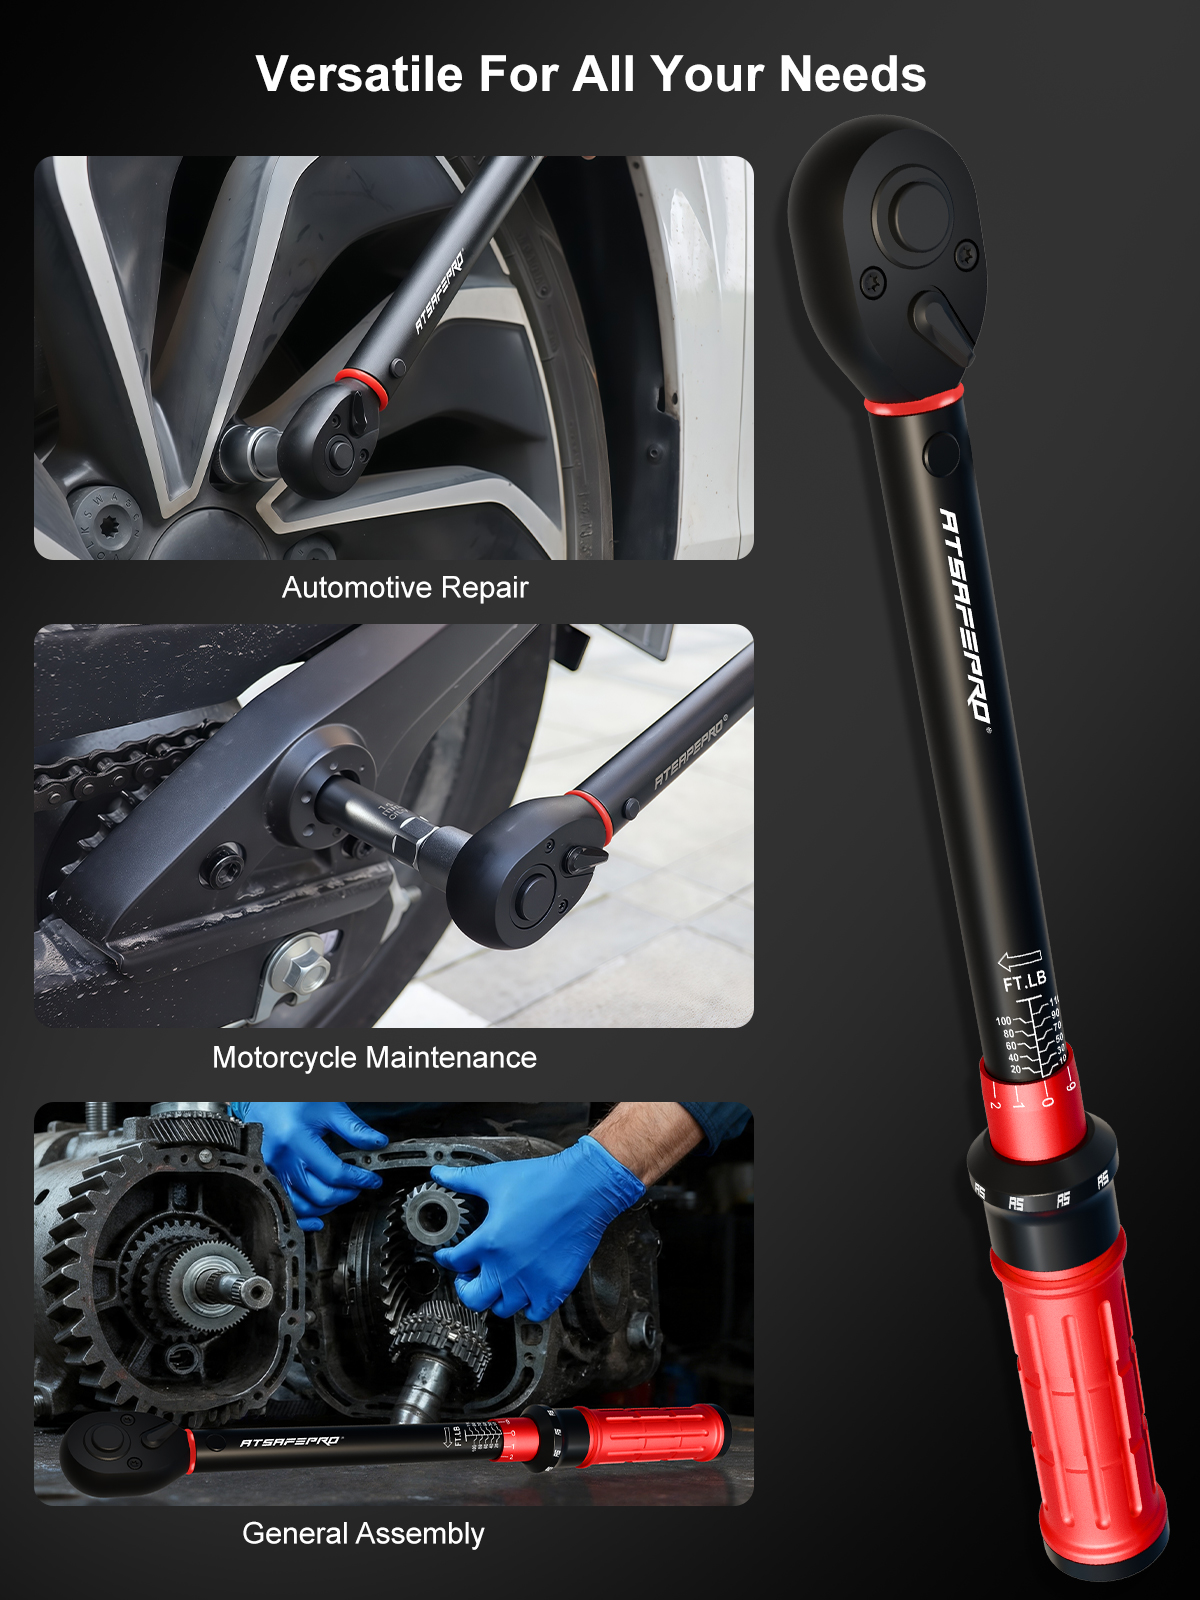
Before diving into usage, it's essential to familiarize yourself with what makes the ATSafePro torque wrench a top choice. This tool is engineered with a robust build using durable materials that withstand intense torque forces, ensuring long-term reliability in demanding environments. Its adjustable ratchet head allows for smooth operation in tight spaces, making it ideal for automotive repair where access can be limited. The clear torque scale, marked in ft.lb, simplifies calibration, so you can quickly set the desired torque without guesswork. Additionally, the ergonomic red grip handle provides comfort and a non-slip hold, reducing fatigue during extended sessions and maintaining control even in greasy conditions. By understanding these features, you'll appreciate how the ATSafePro torque wrench combines versatility with precision for tasks like wheel lug nut tightening or engine component assembly.
Step-by-Step Guide to Setting Up Your ATSafePro Torque Wrench
Start by inspecting your ATSafePro torque wrench for any damage or wear, as a well-maintained tool performs best. To set the torque, locate the adjustment mechanism near the handle—typically a knob or dial that interacts with the ft.lb scale. Decide on the required torque value based on your project's specifications; for example, car wheel lugs often require 80-100 ft.lb, while motorcycle parts might need 20-50 ft.lb. Turn the knob clockwise to increase the setting and counterclockwise to decrease it until the scale aligns precisely with your target. Once set, lock the mechanism to prevent accidental shifts during use. Attach the appropriate socket to the ratchet head, ensuring it's securely fitted to avoid slippage. This setup process, which takes just a minute, prepares the ATSafePro torque wrench for accurate application, whether you're prepping for a full vehicle maintenance routine or a quick assembly task.
Applying the ATSafePro Torque Wrench in Automotive Repair
For automotive applications, position the socket over the bolt or nut you need to tighten. Hold the ATSafePro torque wrench firmly by its red grip handle and apply steady, even pressure in the tightening direction. The tool will emit a click or release when the preset torque is reached, signaling you to stop immediately—this 'click' mechanism prevents over-torquing and protects delicate parts like brake calipers or suspension components. In motorcycle maintenance, use the same technique for securing axles or chain adjusters; the adjustable head shines here, allowing access to confined areas without removing other parts. Always work in a stable environment, wearing safety gear, and double-check torque values from your vehicle's manual. With practice, using the ATSafePro torque wrench becomes intuitive, delivering consistent results that enhance vehicle safety and performance.
Advanced Techniques and Maintenance Tips for Longevity
To maximize the ATSafePro torque wrench's potential, incorporate advanced techniques like the 'torque-plus-angle' method for critical fasteners, where you first apply the set torque and then add a specified turn for added security. This is particularly useful in general assembly tasks involving gears or heavy machinery. For calibration, periodically verify accuracy using a torque tester, especially after heavy use, to maintain precision within ±4% as per industry standards. Store the tool in its protective case, away from extreme temperatures, and clean it after each job to remove debris from the ratchet mechanism. Avoid dropping it, as impacts can affect the internal springs. By following these maintenance steps, your ATSafePro torque wrench will remain a reliable partner for years, supporting everything from DIY projects to professional repairs.
Common Mistakes to Avoid When Using the ATSafePro Torque Wrench
Even seasoned users can make errors, so let's address pitfalls to ensure optimal performance. One frequent mistake is ignoring the direction of rotation—always confirm you're tightening (clockwise) rather than loosening, as the tool is designed for precise application in one direction. Another is using worn sockets, which can cause inaccurate readings; always pair with high-quality, matching sizes. Don't force the wrench beyond the click, as this overrides the safety feature and risks component damage. In oily conditions, the red grip handle excels, but wiping down the scale beforehand prevents misreads. Lastly, neglecting to reset the torque after each use can lead to inconsistencies in multi-bolt jobs. By steering clear of these issues, you'll harness the full versatility of the ATSafePro torque wrench, achieving professional-grade results every time.
Why the ATSafePro Torque Wrench is Essential for Your Toolkit
Incorporating the ATSafePro torque wrench into your toolkit isn't just about precision—it's about efficiency and confidence in your work. Its sleek design fits seamlessly into any professional or home garage setup, while the durable construction promises years of service without frequent replacements. From tightening car wheels to assembling machinery, this tool's adaptability covers a broad spectrum of needs, making it a worthwhile investment for auto enthusiasts, mechanics, and technicians alike. Regular use not only improves your project's outcomes but also builds your skills in torque management, potentially saving on costly repairs down the line. As you become proficient, you'll find the ATSafePro torque wrench indispensable, transforming routine tasks into streamlined, reliable processes.
In summary, following this how-to guide equips you to utilize the ATSafePro torque wrench with expertise, ensuring safety and accuracy in every application. Whether tackling a weekend motorcycle tune-up or a complex engine rebuild, this tool empowers you to deliver flawless fastening every time.