


Discovering the Reliability of an Analog Tire Pressure Gauge
In the world of vehicle maintenance, few tools are as essential and straightforward as the analog tire pressure gauge. This classic device has been a staple for drivers and mechanics alike, offering a dependable way to ensure tires are properly inflated without the need for batteries or complex electronics. Picture yourself pulling over on a quiet road, the sun dipping low, and using this simple gauge to check your tire pressure, providing peace of mind for the journey ahead. As someone who's always valued precision in everyday tasks, I find the analog tire pressure gauge to be a timeless companion, especially when compared to more modern alternatives.
What draws me to the analog tire pressure gauge is its unassuming design and immediate feedback. Unlike digital versions that might flicker or require setup, this gauge delivers a clear, mechanical reading with just a press against the valve stem. It's the kind of tool that feels reassuringly solid in your hand, built to last through countless checks at gas stations or in your garage. For those who appreciate the tactile nature of hands-on maintenance, incorporating a tire pressure gauge like this into your routine isn't just practical—it's almost therapeutic, a small ritual that keeps your vehicle running smoothly.
Why Choose an Analog Tire Pressure Gauge for Everyday Use
Opting for an analog tire pressure gauge often comes down to its simplicity and reliability in diverse conditions. Imagine a rainy afternoon or a dusty workshop; this gauge won't fail you due to a dead battery or screen glare. Its needle dial provides an instant visual cue, making it easy to spot if your pressures are off, which is crucial for safety and fuel efficiency. Over the years, I've seen how underinflated tires can lead to uneven wear or even blowouts, and regularly using a tire pressure gauge has saved me from those headaches.
The beauty of the analog design lies in its no-frills operation. You simply remove the valve cap, press the gauge firmly onto the stem, and read the pressure as the needle settles. This direct interaction fosters a better understanding of your vehicle's needs, turning maintenance into an intuitive skill rather than a chore. For families or frequent road trippers, having a reliable tire pressure gauge on board means being prepared for the unexpected, ensuring everyone arrives safely.
Moreover, analog models are often more compact and portable, slipping easily into a glove compartment or toolkit. They're forgiving for beginners, with clear markings that don't overwhelm, yet accurate enough for professionals monitoring fleet vehicles. In my experience, the analog tire pressure gauge stands out for its cost-effectiveness, delivering professional-grade results without the premium price tag of high-tech gadgets.
How to Use a Tire Pressure Gauge Effectively
Learning how to use a tire pressure gauge is straightforward, but mastering it can elevate your maintenance game. Start by parking on a level surface and letting your tires cool down after driving—this ensures the most accurate reading, as heat can inflate pressures temporarily. With your analog tire pressure gauge in hand, approach each tire methodically, beginning with the front driver's side and working clockwise.
To use the tire pressure gauge properly, first inspect the valve stem for dirt or debris; a quick wipe with a cloth prevents false readings. Then, press the gauge's nozzle squarely onto the stem until you hear a hiss of air, holding it steady for a couple of seconds. The needle will jump and then stabilize, revealing the current pressure. Compare this to your vehicle's recommended PSI, usually found on a sticker inside the driver's door or in the owner's manual. If it's low, add air using a compressor, rechecking with the gauge until it's spot on.
Don't forget the spare tire—many overlook it, but a flat spare is useless in an emergency. As you practice how to use a tire pressure gauge, you'll notice patterns, like seasonal changes affecting pressure, allowing you to stay proactive. This hands-on process not only maintains tire health but also extends their lifespan, saving money in the long run.
One tip I've picked up is to deflate slightly if overinflated, then reinflate precisely; the analog gauge's sensitivity helps here, avoiding overcorrections. For trucks or SUVs with larger tires, ensure your gauge's range covers higher pressures, typically up to 50 PSI or more. By integrating how to use a tire pressure gauge into your monthly routine, you'll build confidence and keep your rides safer and smoother.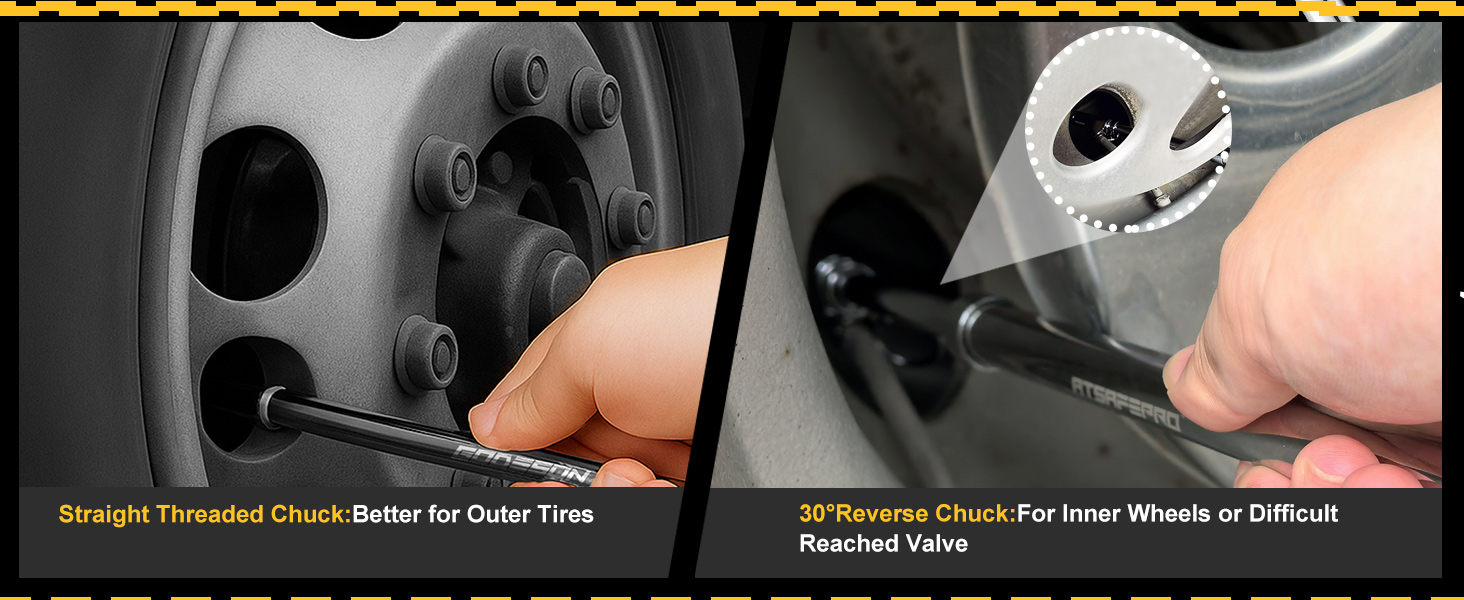
Enhancing Your Toolkit with Precision Tools
While the analog tire pressure gauge holds its own, exploring complementary tools can streamline your maintenance efforts. For instance, pairing it with a basic air compressor turns roadside checks into full inflations on the go. I've found that combining these creates a robust system, where the gauge's accuracy guides the compressor's output, preventing guesswork.
Consider the broader benefits: proper tire pressure improves handling, reduces rolling resistance for better mileage, and minimizes environmental impact by cutting excess fuel use. In a world leaning digital, the analog tire pressure gauge reminds us of the value in mechanical simplicity, reliable even in remote areas without power sources.
As we wrap up, remember that whether you're a weekend warrior or daily commuter, investing time in learning how to use a tire pressure gauge pays dividends in safety and efficiency. The next time you hit the road, reach for that trusty analog tire pressure gauge—it's more than a tool; it's your vigilant partner ensuring every mile is secure and sound.





